Training 9 min read
Trail Running for Beginners: How to Go From Road to Trail
Your road pace stops making sense on the trail. Learn to run by effort, power hike the climbs, descend with control, pick the right shoes and move from road to trail in 6 weeks.
Published by BEON.RUN ·
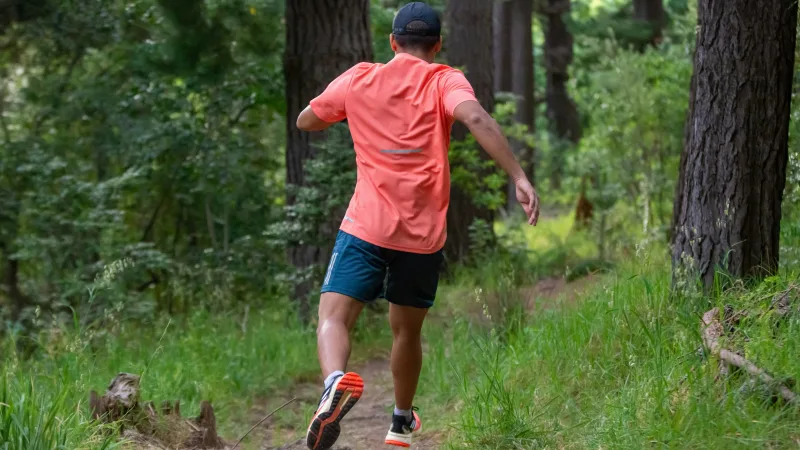
You have been running on the road for a year, you know your 10K pace, and today you turn onto a forest trail with a few climbs. Three kilometers in, your watch shows a pace two minutes slower than usual, your calves are burning and on the first descent you step like you are on ice. That does not mean trails are not for you. The terrain just plays by different rules.
This guide covers what road runners usually do not know: why min/km pace loses its meaning, how to climb and descend, which shoes to look for, what to carry, a 6-week road-to-trail plan, how to choose your first trail race and which mistakes to avoid. Safety, signal and live links in the high mountains have their own article: trail and mountain runs with a live link.
Why pace per kilometer means less on trails
On the road, a kilometer is a kilometer. On a trail, one kilometer is a flat gravel path and the next is 120 m of climbing over roots. Comparing pace between those two says nothing about your fitness, and forcing your "normal" pace uphill gets you into the red within 10 minutes.
So switch to two other measures:
- Effort. Easy runs follow the talk test: you can speak in full sentences, uphill too. If you cannot, slow down or walk.
- Time. Plan sessions in minutes, not kilometers. "70 easy minutes in the woods" is a better goal than "12 km", because it does not push you to chase distance on a tough section.
A rough mountain rule of thumb says that 100 m of climbing costs about as much effort as 1 km of flat running. It helps you estimate how long a route will take. If you want to compare trail numbers with the road, refresh the basics in our running pace guide.
On top of that, GPS in phones and watches is less accurate in forests and valleys, so trail distance often differs between devices. We explain why in why your watch and phone show a different distance.
Power hiking: walking uphill is a skill, not a failure
On a steep climb a fast hike is often almost as quick as running and uses clearly less energy. In trail races everybody hikes. The difference is how.
Good power hiking looks like this:
- Short, quick steps, landing on the whole foot or forefoot, no long lunges.
- Lean from the ankles, not from the waist. Chest slightly forward, back straight.
- Hands on thighs on very steep sections: press down on your thighs with each step to take load off your calves.
- Steady breathing. Hike hard, but so that you can start jogging as soon as it flattens out.
A simple beginner rule: if running uphill is slower than your fast hike, or you cannot talk while doing it, hike.
Uphill running technique
On gentle climbs you keep running, just differently than on the flat. The goal is to hold your effort, not your speed.
- Shorten your stride and raise your cadence. Many small steps instead of a few long ones. A long uphill stride is a calf workout you did not ask for.
- Drive with your arms. Elbows bent, swinging forward and back, not across your body. Your arms set the rhythm for your legs.
- Look 3-5 meters ahead. Pick your footing early, but do not stare at your shoes.
- Do not attack the bottom. Start calmly and push only near the top.
Downhill running technique: where beginners lose the most
Descending is a skill you barely practice on the road, yet on trails it decides your time, your leg fatigue and your risk of falling. Your quads work as brakes on the way down, which is why first trail runs leave the front of your thighs sore.
The basics of downhill running technique:
- Body perpendicular to the slope or slightly forward. Leaning back is the most common mistake: your heel digs in, you brake with every step and you are more likely to slip.
- Short, quick steps. Your foot lands under your body, not far in front of it. The steeper and more technical, the shorter the step.
- Bent knees. They are your suspension. A straight knee on a descent sends the impact straight into your joints.
- Arms wide. On technical descents let your elbows drift out to the side for balance.
- Eyes ahead. Look a few meters down the trail and plan 2-3 steps in advance. Your feet know where to land if your eyes were there first.
- Control over courage. Descend only as fast as you could stop at any moment.
Trail running shoes: what to look for
For your first runs on dry, packed paths your current road shoes will do. Once mud, wet roots and rocks show up, trail shoes make a real difference. You do not need brand names, just know what to look for.
| Feature | What to check |
|---|---|
| Lugs (outsole) | Shallower for packed trails and gravel, deeper and more widely spaced for mud and soft ground |
| Drop | The heel-to-toe height difference. If you run in high-drop road shoes, do not jump straight to a very low drop |
| Protection | A reinforced toe cap and upper protect your toes from rocks, a rock plate in the sole shields your foot from below |
| Fit | The heel feels locked in and your toes have room. Your foot must not slide forward on descents |
| Cushioning | More for long, rocky routes, less for better ground feel on shorter runs |
Try shoes on in the afternoon, in running socks, and test them on a ramp or stairs in the store if you can.
What to carry on a trail run
On the road you often run with just your phone. On forest and mountain trails, water and shops are not around every corner, and the weather changes faster. For a trail run of about an hour or more, bring:
- Water. A handheld bottle, a soft flask in a vest or a belt with a bottle. On longer runs, especially in summer, something to eat as well.
- An extra layer. A light windbreaker or rain jacket packs small and makes a big difference when you stop or reach an exposed ridge.
- Your phone. Charged, with your route loaded and the local emergency number saved (112 in Europe, 911 in the US). Carry it securely in a vest or belt, because you need your hands free on descents. A phone in your hand or a bouncing pocket gets old fast.
- A running vest for longer outings: it bounces less than a regular backpack.
Tell someone where you are going and when you will be back, especially on new trails.
A 6-week road-to-trail transition plan
This plan assumes you already run 3 times a week for 30-45 minutes on the road. You gradually swap some runs for trails and measure volume in minutes. Easy means talk-test easy, uphill included.
| Week | Run 1 | Run 2 | Run 3 |
|---|---|---|---|
| 1 | Road, easy 40 min | Flat trail, easy 35 min | Road, easy 40 min |
| 2 | Road, easy 40 min | Gently rolling trail 40 min, hike the steep bits | Flat trail 45 min |
| 3 | Road or trail, 40 min with 4-6 x 30 s uphill hike or jog | Rolling trail 50 min | Road, easy 35 min |
| 4 | Trail 40 min + 4 x gentle downhill technique | Rolling trail 55 min | Road or trail, easy 35 min (lighter week) |
| 5 | Trail 45 min with 5-6 x 1 min uphill power hike | Hilly trail 65 min, controlled descents | Road, easy 40 min |
| 6 | Trail 45 min + 5 x downhill technique | Trail 75-80 min with climbs and descents | Road or trail, easy 35 min |
A few rules that go with the table:
- Easy terrain first. Packed park or forest paths, then rolling hills, and only then roots and rocks.
- Do not force progress. If your quads stay sore for more than 2-3 days after a descent session, repeat the week.
- Strength once a week. Squats, lunges, calf raises and single-leg balance work prepare your ankles and thighs for uneven ground.
How to choose your first trail race
When picking your first trail race, look at two numbers: distance and elevation gain. A 12 km race with 300 m of climbing is a completely different effort from 12 km with 1,000 m of climbing.
- Distance: start with roughly 10-15 km (6-9 miles). Many big trail festivals, including well-known mountain events in the Alps and elsewhere, offer short courses alongside their ultras, and those are often ideal for beginners.
- Elevation gain: a few hundred meters is a sensible first step.
- Cut-off times: check that your easy effort gets you in with a comfortable margin.
- Mandatory gear: read the rules early and train with the kit you will have to carry.
- Terrain: look at the course description and elevation profile. Save rocky, technical descents for later.
Organizers usually publish the course as a GPX file: load it and run sections of it in training.
A GPX route and a live map for your people
On trails it is easy to miss a junction, so it pays to run with the route on your phone.
Honest limits: in a mobile browser the screen has to stay on (BEON.RUN keeps it awake), and locking the screen or switching apps can pause GPS. In deep valleys and dense forest GPS is less accurate, and if you lose signal for a moment, the points stored on your phone are sent once the connection returns. Want to try it on your local trails? Create a free account.
Common mistakes when moving from road to trail
Chasing your road pace
You glance at your watch and push uphill so you do not "lose time". Result: you are cooked after the first climb. Run by effort and treat pace as trivia.
Too much, too soon
Trails load your body differently: ankles, quads, hips. Even if you run 50 km a week on the road, start with short trail sessions and build gradually.
Leaning back on descents
Sitting back is exactly when slips and sore knees happen. Short steps, bent knees, body over your feet.
Staring at your feet
Looking only straight down makes you react too late. Look a few meters ahead and your feet will find good spots.
No water, no layer
"Just an hour in the woods" can end with dehydration or getting cold during a stop. A bottle and a light jacket weigh little.
New shoes on race day
Test trail shoes over several runs, including descents and mud, before you race in them.
The bottom line
Moving from road to trail is a change of mindset: run by effort and time, hike the climbs without shame, descend with short steps and your eyes ahead. After six gradual weeks the terrain stops being an obstacle and becomes the best part of your week. Start with the nearest forest, then pick a short first race.
Frequently asked questions
Do I need trail running shoes to start trail running?
Not for your first runs on dry, packed paths in a park or forest: your road shoes are fine. Once you hit mud, wet roots, rocks or steep descents, trail shoes with a grippier outsole and a tougher upper give you much better traction and protection. You do not need them on day one, but get them before your first trail race.
Is it okay to walk uphill in a trail race?
Yes, it is standard tactics. On steep climbs a strong power hike is often nearly as fast as running and costs far less energy. Experienced trail runners walk too. Keep it active: short steps, lean from the ankles, hands pushing on your thighs, or poles if the race rules allow them.
How fast should I run on trails if pace per kilometer means little?
Run by effort and time. On easy runs use the talk test: you should be able to speak in full sentences, including uphill. If you start gasping on a climb, walk. Plan runs in minutes rather than kilometers, because the same kilometer on a trail can take twice as long as on the road.
What distance should my first trail race be?
Keep it short: roughly 10-15 km (6-9 miles) with modest elevation gain, a few hundred meters. That lets you learn the terrain, the descents and your own pacing without running out of energy after three hours. Longer distances can come after a few months of regular trail training.
Let your people follow your route live
Video, GPS map and pace in one link. Viewers need no app and no account.