Training 9 min read
Nordic Walking for Beginners: Technique, Pole Length and a 6-Week Plan
Correct nordic walking technique step by step, the pole length formula, tips for pavement and trails, the most common mistakes and a simple plan for your first six weeks.
Published by BEON.RUN ·
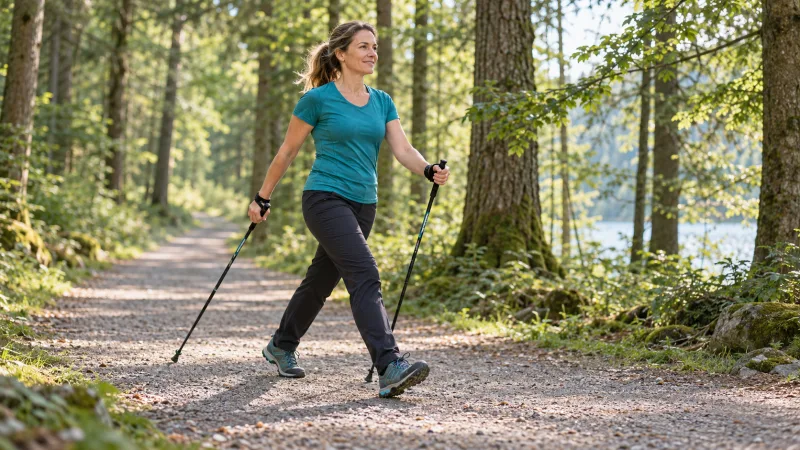
Nordic walking looks simple: grab two poles and go. That is exactly why so many people get it wrong. The poles drag behind, tap in front of the feet or swing around without doing any work, and the walk ends up being an ordinary walk with extra luggage.
Done right, it is a full-body workout that is easy on the joints and works for almost any age and fitness level. This guide covers the technique step by step, how to choose pole length, the mistakes to avoid and a simple 6-week starter plan. At the end, how to let family or your walking group follow along live.
How nordic walking differs from regular walking
When you walk, your legs do nearly all the work. In nordic walking your arms, shoulders, back and core join in, because every push on the pole drives you forward. At the same pace, walking with poles usually feels like more effort, while the poles also give a sense of stability.
It is not running and it does not need to be. Nordic walking is a low-impact endurance activity you can scale to your age and fitness. For some people it is a way back into exercise, for others an easy session on days off from running.
There is one condition: technique. Without it, the poles are just something to carry.
Nordic walking technique, step by step
Learn on flat, even ground: a park path, a riverside trail or a firm forest track. For the first few minutes you can walk without planting the poles at all, just letting them trail loosely behind you to find the rhythm.
1. Posture
Stand tall, relax your shoulders and let them drop away from your ears. Look ahead about 10-15 meters (30-50 feet), not at your feet. Lean very slightly forward with your whole body from the ankles, not by bending at the waist.
2. Opposite arm, opposite leg
This is the same pattern as normal walking. When your right leg steps forward, your left arm swings forward, and the other way round. If you lose it, let the poles hang loose on the straps, walk normally and notice how your arms swing in opposition on their own. Then simply make that movement bigger.
3. The pole plant
Plant the pole at an angle with the tip pointing backward, roughly level with the middle of your stride, between your feet, not in front of your leading foot. Your front arm is almost straight and around hip to waist height. The pole should never stand upright in front of you like a walking cane.
4. The push-off
This is the most important phase. Once the tip is in, press down and push back, guiding your arm along your body until your hand passes your hip. The elbow straightens at the end. The push, not the plant, is what puts your upper body to work.
5. Opening the hand
As your hand passes your hip, open it and let go of the grip. The pole stays attached by the glove strap while your hand relaxes for a moment. As the arm swings forward again, your hand closes around the grip. Squeezing the pole the whole time tires your forearms and stiffens your shoulders.
6. Stride and foot roll
Land on your heel, roll through the foot and push off from your toes. The stride is a little longer than on a stroll but still natural, with no lunging. With a good rhythm, poles and feet land in an even beat.
How to choose nordic walking pole length
The rule you will see most often: height in cm x 0.66-0.68. Treat it as a starting point, not a law. Some manufacturers publish their own charts, and arm length and how fast you walk matter too.
| Height | Approximate pole length |
|---|---|
| 155 cm (5'1") | about 102-105 cm |
| 160 cm (5'3") | about 105-109 cm |
| 165 cm (5'5") | about 109-112 cm |
| 170 cm (5'7") | about 112-116 cm |
| 175 cm (5'9") | about 115-119 cm |
| 180 cm (5'11") | about 119-122 cm |
| 185 cm (6'1") | about 122-126 cm |
| 190 cm (6'3") | about 125-129 cm |
Quick check: stand the pole upright next to your foot and hold the grip. Your elbow should bend at about 90 degrees, with your forearm roughly parallel to the ground.
A few practical points:
- Between two sizes? Beginners usually do better with the shorter one. A longer pole suits a faster pace and a longer stride.
- Adjustable or fixed length? Adjustable (telescopic) poles are a good first choice while you are still finding your length, or if several people in the household will share them. Fixed-length poles are usually lighter and stiffer and have no locking mechanism to slip. They typically come in 5 cm steps.
- The strap matters. Real nordic walking poles have a half-glove or glove-style strap that lets you open your hand on the push-off. A simple loop from a trekking pole does not do that.
- Material. Poles with a high carbon fiber content are usually lighter and absorb vibration better, aluminum poles are cheaper and tough.
Tips and paws for different surfaces
- Rubber paws (asphalt pads): pavement, sidewalks, concrete boardwalks. They grip, stop the clatter and protect the tip. The angled sole should point backward.
- Metal or carbide tip: grass, forest trails, gravel, beach sand, snow and ice. It needs to bite into the ground.
Paws come off in seconds, so on mixed routes keep them in a pocket. Replace them when worn, as uneven wear changes the angle of the pole.
Common beginner mistakes
- Poles too long. Your hand lands too high, your shoulders creep up and the push gets short. A frequent reason for a stiff neck after a walk.
- Planting the pole in front. The pole brakes instead of driving you. The tip should land at an angle, between your feet.
- Dragging the poles. They tap the ground but there is no pressure and no push. It looks like nordic walking but works like a stroll.
- Same arm, same leg. Right arm and right leg forward together. Slow down, let the poles hang loose and go back to your natural rhythm.
- Death grip. Never opening your hand tires your forearms. The strap is there so you can let go.
- Arms working only from the elbow. The movement starts at the shoulder, and the hand travels past the hip.
- Eyes on the ground. Head down rounds your back. Look 10-15 meters ahead.
- Wrong tips for the surface. Paws slip on roots and mud, bare tips skid and bounce on pavement.
A simple 6-week plan for beginners
The plan uses 3 walks a week with a rest day between them. Keep the pace easy enough to talk in full sentences. Start every walk with 5 minutes of relaxed walking, and finish with a few minutes of slow walking and gentle stretching.
| Week | Walk 1 | Walk 2 | Walk 3 | Focus |
|---|---|---|---|---|
| 1 | 20 min | 20 min | 25 min | Posture, opposite arm and leg |
| 2 | 25 min | 25 min | 30 min | Planting the pole behind you |
| 3 | 30 min | 25 min | 35 min | Pushing past the hip |
| 4 | 30 min | 30 min | 40 min | Opening the hand, rhythm |
| 5 | 35 min | 30 min | 45 min | Gentle hills |
| 6 | 35 min | 35 min | 50-60 min | A relaxed longer walk |
If a week felt too hard, repeat it. The plan should fit you, not the other way round. Joint pain, dizziness or unusual shortness of breath are a signal to stop.
Shoes, clothing and your phone
You do not need much to start. Comfortable cushioned shoes with good grip (a lugged sole helps on trails), layers you can unzip because you warm up fast, and a hat on cold days.
Carry your phone so your hands stay free: a waist belt, a vest or a close-fitting pocket. Holding it in the same hand as a pole ruins your technique. Our comparison of ways to carry your phone while running applies to walking just as well.
In autumn and winter many walks start in the dark. Reflective details and a headlamp are the basics, and you will find more in our guide to running in the dark and in winter.
Share your walk live with family or your group
Nordic walking is often social. Some people walk with a club, others go alone at sunrise along the beach, and their kids or partners would like to know everything is fine. Texting every fifteen minutes is not much fun with poles in your hands.
Worth knowing before your first walk with a live link:
- Chat read aloud. Your people type messages and you hear them in your earbuds, without taking the phone out. Handy when both hands hold poles.
- Numbers that do not jump. GPS points with poor accuracy and unrealistic jumps are rejected, and a pause does not add distance, so a bench stop does not inflate your result.
- Privacy trim. If you start from your front door, hide the first and last 200, 500 or 1000 m of the route so your address stays private.
- Visibility. Activities are private by default. To share with family, unlisted (link only) is enough.
- Weak signal. In woods or valleys the network can drop. GPS points are buffered on the phone and sent when the signal returns, so the route has no gap.
- The screen. In a mobile browser the screen must stay on. Locking the phone or switching apps can pause GPS and camera, and streaming with the camera uses a lot of battery and data.
- Duration. The FREE plan allows streams up to 30 minutes and up to 20 viewers at once. Longer walks need a higher plan, see pricing.
If you often walk alone, also read our guide to staying safe on solo runs. BEON.RUN shows where you are, but it is not an emergency service: in an emergency, call 112 in Europe or 911 in the US.
For walking groups, group training on the PLATINUM plan supports up to 4 people, each with their own GPS and stream, with all of them on one shared map for viewers.
Checklist before your first walk
- Pole length checked with the elbow test
- Rubber paws in your pocket for pavement, bare tips for trails
- Glove straps adjusted to your hands
- Shoes with good grip, layered clothing
- Phone in a belt or vest, hands free
- Activity type set to nordic walking, link sent to your people
- Privacy trim set
- First 5 minutes easy, then focus on technique
Start with a short walk in the park and work on one part of the technique at a time. If you want someone to keep you company from a distance, create a free account and send them the link before you head out.
Frequently asked questions
How do I choose the right nordic walking pole length?
A common starting rule is your height in centimeters multiplied by about 0.66-0.68. For someone 170 cm (5'7") tall, that gives roughly 112-116 cm. Then check it: with the pole upright next to your foot, your elbow should bend at about a right angle. Beginners often find a slightly shorter pole easier.
Is nordic walking the same as walking with trekking poles?
No. Trekking poles are mainly for support and balance on hills, and you usually place them in front of you. In nordic walking the pole is planted at an angle behind you and you actively push back with your arm. Nordic walking poles also have a special glove strap that lets you open your hand.
How often should a beginner go nordic walking?
Two or three walks a week of 20-30 minutes, with a rest day in between, is a good start. Add a few minutes per week rather than doubling the distance. If you have a heart condition, joint problems, high blood pressure or are returning to exercise after a long break, talk to your doctor before you start.
When should I use rubber paws and when the metal tips?
Use rubber paws (asphalt pads) on pavement, sidewalks and concrete, where they grip and keep the poles quiet. Use the bare metal or carbide tip on grass, forest trails, gravel, sand and snow, where it needs to bite into the ground. Paws come off in seconds, so carry them in a pocket on mixed routes.
Let your people follow your route live
Video, GPS map and pace in one link. Viewers need no app and no account.